Why it matters
Pruning is a recurring decision about light, airflow, strength, and future fruiting wood. The correct season and training system depend on species, local disease pressure, and the tree’s age. A cut cannot be undone, so begin by identifying the reason for each proposed removal.
What you’ll need
Tools
- Bypass pruners
- Hand saw
- Disinfectant for tools
Materials
- Tree map
- Notebook
Before you begin
Safety & limits
- Stay on the ground; leave overhead limbs, large branches and work near wires to qualified arborists.
- Check local advice for disease-sensitive species and pruning season.
Work carefully, in order
The method
- 01
Identify the tree and system
Confirm the species, rootstock if known, age, and existing training form. Inspect the tree from several sides and look for its leader or main framework, fruiting wood, and graft union. Use a species-specific extension guide before selecting a season or making a structural cut.
- 02
Mark priorities before cutting
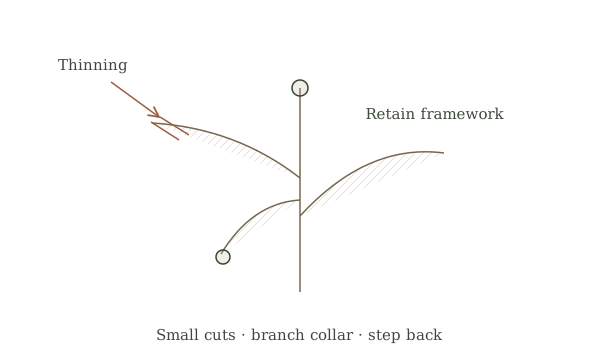
Locate dead, damaged, rubbing, and inward-growing branches. Mark only a few candidates and imagine the open space each removal would leave. Distinguish a thinning cut, which removes a shoot at its origin, from a heading cut, which prompts growth near the cut.
- 03
Prepare clean tools and access
Use a sharp tool that fits the branch diameter; do not twist a small pruner through thick wood. Keep feet on level ground and another person clear of the work zone. If the branch needs a ladder, rigging, or a chainsaw, stop and obtain qualified help.
- 04
Make limited cuts at the proper point
For a suitable small branch, cut outside the branch collar without leaving a long stub or slicing into the trunk. Support the branch so bark does not tear. Work slowly, step back after each removal, and retain enough healthy leaf-bearing wood to support the tree.
- 05
Record and revisit
Photograph the tree from fixed positions and note date, weather, cultivar, and cuts. Remove diseased material according to local guidance, clean tools where disease is a concern, and observe new growth through the season. Use the response to plan next year rather than making repeated corrective cuts immediately.
Mistakes to avoid
- Topping a tree to force a smaller size
- Removing much of a young canopy at once
- Making flush cuts through the branch collar
If it isn’t working
Vigorous upright shoots return
Check whether previous heading cuts or excess removal stimulated regrowth; plan a modest species-specific correction.
A large limb appears unsafe
Keep people away and consult a qualified arborist rather than attempting an overhead cut.
Then & now
Historical context
Orchard workers shaped young trees over several years with hand tools; the lasting skill is observation and restraint.
The modern equivalent
A trained arborist can assess large or hazardous trees and species-specific training systems.
Sources & review
Editorial draft — specialist review pending. Written 2026-09-27. Sources support the stated scope; this page has not been professionally certified.
- UMN Extension — pruning and training apple trees ↗
Supporting reference; consult the original for species and local details. Checked 2026-09-27.
- OSU Extension — training and pruning your home orchard ↗
Supporting reference; consult the original for species and local details. Checked 2026-09-27.


