Why it matters
Sharpening removes metal until the two sides meet at an edge. Honing refines that edge; it cannot indefinitely compensate for a rounded bevel. Consistency matters more than choosing a fashionable angle that may not suit the knife.
What you’ll need
Tools
- Sharpening stone
- Non-slip base
Materials
- Water or oil specified for the stone
Before you begin
Safety & limits
- Keep hands outside the cutting path. Children need direct adult supervision.
Work carefully, in order
The method
- 01
Identify the edge
Check whether the knife is an ordinary double-bevel blade. Serrated, single-bevel, heavily damaged, and specialist knives need different methods. Follow the maker’s bevel guidance instead of treating every knife as identical.
- 02
Secure the stone
Set the stone on a non-slip support at a comfortable height. Prepare it with the liquid specified by its manufacturer. Keep the supporting hand away from the blade path and work with enough light to see the bevel.
- 03
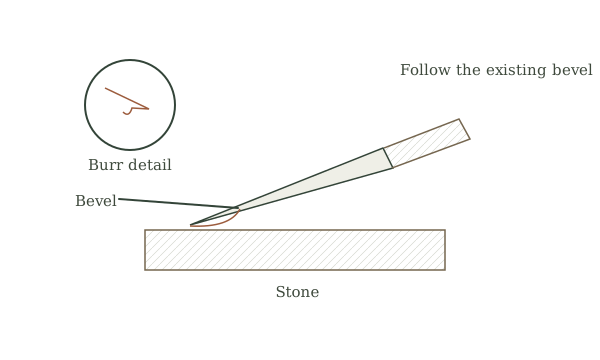
Follow the existing bevel
Use slow controlled strokes with modest pressure, maintaining contact along the intended bevel. A marker line on the bevel can show where metal is being removed. Work heel, middle, and tip deliberately rather than rounding the tip with a rocking motion.
- 04
Check and refine
Use good light and a safe inspection method to identify whether the edge has been reached along its length. Never slide a finger along the edge. Reduce pressure and alternate sides to remove the burr, moving to a finer abrasive if the chosen process calls for it.
- 05
Clean and test safely
Remove abrasive residue, dry the blade, and test with a controlled cut on appropriate material on a board. Do not test on skin or by shaving hair. Clean the stone, protect the edge, and record what worked for the next sharpening session.
Mistakes to avoid
- Changing angle every stroke
- Pressing harder to speed the process
- Leaving a wire burr on the edge
If it isn’t working
Knife sharpens only in spots
Check stone flatness and bevel contact.
Tip becomes rounded
Slow down and maintain the tip’s intended geometry.
Then & now
Historical context
Abrasive stones remain effective because the underlying task is controlled metal removal.
The modern equivalent
A guided sharpening system makes angle control easier, while professional service suits damaged or specialist blades.
Sources & review
Editorial draft — specialist review pending. Written 2026-09-20. Sources support the stated scope; this page has not been professionally certified.
This entry describes general practice. A topic-specific source review is still required before it can be marked reviewed.
How this manual handles evidence →