Why it matters
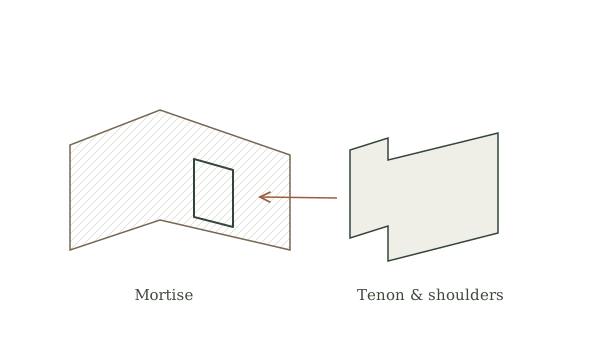
The mortise is the socket; the tenon is the projecting tongue. Shoulders locate the joint and resist racking when properly fitted. Accurate reference faces and patient fitting matter more than forcing an oversized tenon into a weak mortise.
What you’ll need
Tools
- Marking gauge
- Square
- Tenon saw
- Chisel
- Mallet
- Clamps
Materials
- Straight-grained practice timber
Before you begin
Safety & limits
- This exercise is not a load-rated timber-frame connection.
Work carefully, in order
The method
- 01
Choose practice stock
Use sound straight-grained pieces for a non-structural exercise. Mark a reference face and edge on each. Draw the joint and label cheeks, shoulders, and mortise ends before cutting so waste and retained wood are unambiguous.
- 02
Mark from common references
Use one gauge setting for corresponding dimensions and work from the marked faces. Square shoulder lines around the piece. Hatch the waste. Check the intended assembled orientation before making an irreversible cut.
- 03
Cut the tenon
Clamp the stock and saw on the waste side of the cheek lines. Cut shoulders carefully without sawing into the tenon. Leave a little material for fitting rather than trying to repair a loose joint with glue later.
- 04
Cut the mortise
With instruction in safe chisel handling, remove small amounts of waste while keeping hands behind the cutting edge. Work toward the marked boundaries gradually and preserve square ends. Support the work so chopping forces do not tip the bench.
- 05
Fit without forcing
Test the joint dry and remove only marked high spots. Aim for controlled hand pressure and seated shoulders, not hammering that splits the mortise walls. Check squareness. Choose an appropriate adhesive or peg detail only after the fit is sound.
Mistakes to avoid
- Marking from different faces
- Cutting on the wrong side of a line
- Hammering a tight joint together
If it isn’t working
One shoulder will not close
Find the interfering high spot before trimming every surface.
Tenon is loose
Make a new practice part rather than calling filler a structural repair.
Then & now
Historical context
This family of joints appears in furniture and frames across many traditions, with different proportions and fastening details.
The modern equivalent
Dowels or machine-cut joinery can be useful alternatives for suitable furniture work.
Sources & review
Editorial draft — specialist review pending. Written 2026-09-20. Sources support the stated scope; this page has not been professionally certified.
This entry describes general practice. A topic-specific source review is still required before it can be marked reviewed.
How this manual handles evidence →